Home » Posts tagged 'leak detection'
Tag Archives: leak detection
How Plumbers Repair Faucets
Plumbers repair, install, and maintain pipes, fixtures, and appliances that provide water, heat, and waste removal in residential, commercial, and industrial buildings. They also read and interpret blueprints, building codes, and other specifications to plan plumbing projects.
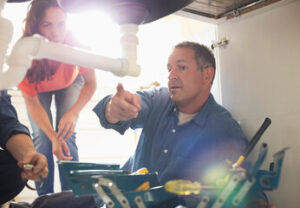
Plumbers often collaborate with other construction tradespeople on large projects such as hospitals, power plants, and factories. These jobs require them to have physical stamina and the ability to work in tight spaces. Contact Plumbers Cranford NJ for professional help.
Faucet handles are a vital part of the faucet, and they can have a big impact on the look and style of your bathroom or kitchen. They come in a variety of finishes and designs to complement any decor. You can also choose from a wide selection of materials for the handle, including ceramic, plastic, or metal. Some handles are made from stainless steel, which is durable and easy to clean, while others are made of brass or bronze. The material for your faucet handle can make a difference in how long it will last and how well it will resist corrosion or wear.
If your faucet is leaking from the handle, it may be time to replace it. Replacing the handle is a relatively simple process that can be done at home. To do this, first turn off the water supply to the faucet by turning off the valves under the sink or using a water shutoff valve at the house. Next, remove the decorative cap or cover on the faucet handle, which will expose a screw that holds the handle in place. This screw will usually be a Phillips or flat-head screw, and you can use a screwdriver to remove it. Once the screw is removed, carefully lift off the handle, exposing the faucet cartridge.
Depending on your type of faucet, there may be another screw or nut at the base of the handle that you need to unscrew with an adjustable wrench. This is often called the bonnet nut or retaining nut. Once this is removed, you can unscrew the handle from the base and inspect the cartridge and O-rings for signs of damage or wear. If the O-rings are damaged, you can replace them with new ones.
Once you have the replacement handle and O-rings, reassemble the faucet by following the manufacturer’s instructions. If the faucet is still leaking from the handle, you can try adding a small amount of plumbers grease or WD-40 around the O-ring to help it seat properly. Alternatively, you can try to remove the handle and soak it in vinegar, which will help to loosen any mineral buildup and may allow you to remove some of the debris that is stuck.
Faucet Valve
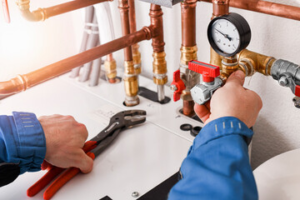
When you turn on your faucet water may flow out the spigot or it may be leaking around the handle. If the water is leaking from the spigot, it’s probably because the rubber seat washer has worn out. Similarly, if the handle leaks, the cam or O-ring is worn out. Repairing these parts is a relatively simple job for any handy homeowner with good tools. Before you do any repairs, shut off the water supply line to the faucet by turning the knob or lever underneath the sink clockwise. This prevents water from flowing while you work on the valve.
Leaking stem and cartridge valves are the most common type of faucet problem in home kitchens. These are also called “stem-and-seat” valves because the valve’s mechanism consists of a single stem that tightens against a valve seat to seal off the supply of water. To open the valve, the stem is rotated and the washer rises against the seat to let water through. Then the washer lowers against the seat to close the valve again. Stem-and-seat valves typically require only the replacement of a washer or packing to prevent leakage.
A plumber who wants to do a repair on this kind of faucet should first remove the handle screw with a wrench and pull the handle off. Next, use a wrench to loosen the packing nut that holds the stem in place. Then, you can either unscrew the stem with a wrench or insert a screwdriver between the valve body and the faucet head to loosen the stem.
Once the old cartridge is removed, replace it with a new one and reassemble the faucet in reverse order of disassembly. Make sure to clean all of the old O-rings before installing the new ones, and coat them with plumber’s grease. Then you’re ready to test your repaired faucet and determine if any other parts need replacement. You may need to twist the cartridge slightly with a plastic spanner cap or needle-nose pliers in order to line it up with the brass retainer clip.
Faucet Seat
The faucet seat is a fitting in the bottom of the valve housing that has a hole in it for water to flow through. The problem with this component, particularly in two-handle compression faucets, is that it can become worn down by hard water, which leaves mineral deposits on the surface of the seat and causes a leak to develop around the inlet hole. Luckily, the replacement of the faucet seat is relatively simple and inexpensive. In fact, plumbers often make a custom tool for this job that they can purchase for under ten bucks.
To remove the old seat, start by removing the handle and the stem. Then, use a seat wrench to turn it counterclockwise and pull it out. Be sure to get a low lead faucet seat, since those contain less toxic material and don’t require caulking after installation.
Once the new seat is in place, test it to see if you can turn the water on and off without a leak. If it doesn’t work, then it is time to replace the washer or the valve seat.
In most cases, replacing the washer or valve seat will resolve the problem. In other cases, however, the faucet handle itself may need to be replaced. In that case, you can usually find the needed parts at your local hardware store.
One way to help prevent leaking from the faucet handle is to apply a silicone sealant, which will provide an extra layer of protection. You can also lubricate the handle’s adjusting ring, which will help keep it from becoming tightened and creating friction that wears down other components of the faucet.
Another thing that can cause a dripping faucet is the cartridge seat, which sits inside the valve and opens and closes to allow water through. If the seat becomes worn or clogged with mineral deposits, then you will have to replace it in order to stop the dripping. A plumber will use a special tool called a seat grinder, which evens out the worn edges of the valve seat and can be bought at most home improvement stores for under $10.
Faucet Cylinder
Cartridge faucets use a cylinder that moves up and down to control water volume, and rotates left or right to control water temperature. When the handle is rotated, strategically placed holes in the cylinder align with matching ones in the faucet body to allow water to flow. This type of faucet is very popular in bathrooms. Over time, the cartridge can develop a leak and need to be replaced. Replacing the cartridge is a simple 15-minute repair with a kit available at hardware and home centers. Before attempting to replace the cartridge, clean any mineral deposit buildup with distilled white vinegar and a scouring pad or rag. You should also remove the square-top plastic tool, if present, and the brass screw at the top of the cartridge shaft to prepare for the removal of the shaft itself. When installing the new cartridge, be sure to note its orientation and the number of tabs or splines that fit into notches in the faucet body. If there’s a retaining clip, remove it and use pliers to firmly grasp the cartridge and pull it straight up to remove it from the body.
Once the faucet is repaired, you’ll need to shut off the water supply. Locate the shutoff valves under the sink and turn off both the hot and cold water pipes to the faucet. Next, open the faucet handle to release any remaining pressure and allow it to drain completely.
Once the faucet is drained, you can remove the handle by unscrewing the set screw. You’ll need to unscrew the escutcheon cover plate, which might be concealed under a chrome sleeve. If the escutcheon is missing, you can find an Allen wrench or other screwdriver under the handle, inside the faucet body. Once the handle is removed, you can remove the cartridge nut by turning it counterclockwise. Then, you can remove the cam and packing, which will reveal the cartridge. To replace the cartridge, simply unscrew the old one, drop in a new one and tighten the adjusting ring with slip-joint pliers.
Home Plumbing Systems Explained
Home plumbing relies on the natural laws of gravity and pressure to deliver clean water and remove waste. Understanding these systems can help you minimize, if not avoid, the need to call Shreveport Plumbers for leaks and clogs.
Your home plumbing has two subsystems that bring in fresh water and take wastewater away: the water supply line and the drain-waste system.
Home plumbing systems contain two main categories of pipes: those that bring water in and those that take wastewater out. Understanding how these systems work can help you avoid plumbing problems and emergencies as you make your new home your own.
The main water supply pipe, buried underground, brings municipal drinking water into your house from a public water utility or private well. It connects to a water meter that tracks your household water usage and charges you for the water you use. This is also where the main water shut-off valve is located. By turning this valve off, you can stop the flow of water to your entire home in case of a serious emergency like a burst pipe.
Water supply pipes then branch out to carry water to each of your fixtures and appliances, including kitchen faucets, showers, bathtubs, toilets, sprinkler systems, and dishwashers. Behind most of these fixtures are air chambers capped with caps that trap a column of air to cushion the force of onrushing water. Some plumbing systems even include a hot water heater, which keeps your faucets and showers flowing with the press of a button.
Every fixture in your house has a drainpipe that connects to the main drainage pipe. When you flush a toilet or turn on a sink, this pipe transports the waste to your city sewer system or septic tank. To prevent wastewater backups, these drain pipes are angled downwards and supported by a network of vents, cleanouts, and traps throughout your home.
To reduce the amount of water you waste, you can purchase and install low-flow faucets and toilets that have a EPA WaterSense label. These products are designed to be more efficient and can save you up to 20% on your household water bills. In some cases, you may also need to replace your existing plumbing fixtures with more efficient models. A professional plumber can help you determine if replacing your fixtures is necessary. They can also help you find ways to conserve water by locating and fixing leaks and optimizing your household plumbing systems.
A home plumbing system is comprised of two different subsystems—the supply and drainage systems. The drain system is responsible for removing waste while the water system brings in freshwater from the outside world and delivers it throughout the house. Fixtures like toilets, sinks, tubs, and shower receptors connect to the drainage system through a pipe that’s referred to as a fixture drain line. This type of pipe has a special drain trap that keeps sewer gases from entering the house and is positioned below the flood rim level of each fixture. This prevents nasty smells and is a critical part of a sanitary plumbing system.
Most plumbing systems use PVC or copper pipes for their supply and drain lines, respectively. Both of these materials have their strengths and weaknesses when it comes to longevity, durability, and resistance to corrosion. For example, PVC is commonly used for supply lines because it’s inexpensive and lightweight, while copper tends to be preferred for drainage lines because of its longevity and resistance to corrosion.
When it comes to a home plumbing repair, it’s often necessary to drain the entire system. This process allows you to work without the distraction of water in the way, which could complicate or even halt the repair procedure. It also ensures that any clogs or debris that are trapped inside of the pipes are completely removed and that the new repair can take place with complete success.
In order to properly drain your home plumbing system, it’s important to start by opening all of the faucets in your home and flushing every toilet. This will remove any remaining water that’s in the tank or bowl and allow you to inspect the drain line for any signs of damage or clogs.
Then, you’ll want to drain any appliances that use water, like your washing machine, dishwasher, or refrigerator. This will include removing any food or drink items from the dispensers, as well as turning off the appliance’s power source and draining the water supply line.
Next, you’ll need to locate and close the main shutoff valve for your home’s water supply. This is typically located in the basement or near your home’s foundation and should be clearly marked with a label to make it easily accessible in case of an emergency.
Vent pipes are a vital part of your plumbing system. They allow wastewater, sewer gases, and foul odors to escape your home through the roof. If they weren’t installed, your drains would clog, and your home could smell like a sewage dump. In addition to regulating air pressure, they prevent trapped gases and fumes from building up inside of your home, keeping the indoor environment fresh and safe.
You may have heard that your plumbing system needs to be vented, but you might not know why or where these pipes are located. These tubes are often located in the attic or walls, and you can usually see them sticking up through your home’s roof. Most plumbing systems use two types of vents: roof flashing and straight vent pipes. Straight vent pipes are used for most sinks, tubs, and showers, while roof flashing is typically used for water heaters and kitchen vents.
Despite what you might have been told by DIY explainers, your vent pipes are not primarily intended to let air into your plumbing system. In fact, it’s just the opposite: They are designed to allow your plumbing system’s air pressure to escape. Without this air, your drains will create a vacuum that can siphon water and waste back up into your fixtures, creating gurgling noises or even causing them to stop functioning altogether. The primary function of your plumbing vents is to help water move freely through drainage pipes by allowing air to enter and equalizing the pressure.
Regularly inspecting and cleaning your vent pipes can help keep them in good condition. A common problem with these pipes is that they can become obstructed by debris, such as leaves, twigs, and bird nests. In cold climates, they can also freeze and restrict airflow, resulting in clogs and leaks.
One of the most important things you can do to ensure that your plumbing system is working properly is to have it checked by a professional plumber annually. By performing a thorough inspection, your plumber can address any issues before they cause costly problems. Taking the time to invest in your plumbing system will reduce the need for expensive repairs and improve the longevity of your fixtures.
Your home plumbing system routes municipal water from the utility company to appliances and fixtures that use it. These include sink faucets, showers, bathtubs, toilets and washing machines. It also includes the drain-waste-vent system that carries used water and wastes to sewers or septic tanks.
The plumbing system also includes a water heater that is usually located in the garage, basement or a closet. It’s powered by either electricity, natural gas or propane. The water heater heats incoming cold water to hot temperatures, which it then sends to appliances and fixtures.
If you want to save money and reduce your carbon footprint, consider replacing your old gas or electric water heater with a newer energy-efficient model. You can choose from tankless, solar and hybrid models.
A standard water heater has an insulated tank that holds from 20 to 80 gallons. A dip tube brings cold water to the bottom of the tank, and a heating element or burner kicks on to start warming it up. As the water gets hotter, it rises to the top of the tank. The hot water outlet is then connected to your plumbing pipes so it can flow to your fixtures when you turn on a faucet.
In addition to checking for leaks, rust and signs of damage on your water heater periodically, you can help it run more efficiently by following a few simple tips. Keep the temperature set at a comfortable level to save energy. Replace your anode rod occasionally to prevent corrosion. Insulate the tank and pipes to prevent heat loss. Check and adjust the thermostat to a lower setting if your water heater seems to run too hot.
When you’re ready to buy a new water heater, make sure it meets all local plumbing codes for your area. A certified plumbing professional can advise you on the size and installation of your new unit and ensure it will be able to meet your household’s hot water needs. A plumber can also inspect your existing system to identify potential problems and repair or replace parts as needed.